Chocolate Crinkle Cookies!

D0E766E5-EC48-43C0-BD5E-C47E5DB170BB A7AB1689-BCDC-4446-8E3E-C6F26E5D1E3E

Hi Housewives!

Happy New Year!  I hope your holidays were filled with love, family, and delicious food.  Speaking of food, I’ve been getting a lot of rav reviews for my chocolate crinkle cookies!  They were an absolute hit this holiday season and so I’m going to share this cookie recipe with you today.  With winter here and freezing cold temps its nice to have a cookie to bake from scratch and fill your home with yumminess.  I usually make them for the holidays but they are a great cookie to make year round.

  • 1 cup unsweetened cocoa powder
  • 2 cups of white sugar
  • 1/2 cup of vegetable oil
  • 4 eggs
  • 2 teaspoons of vanilla extract
  • 2 cups of all-purpose flour
  • 2 teaspoons of baking powder
  • 1/2 teaspoon of salt
  • 1/2 cup of confectioners’ sugar

Mix together cocoa powder, white sugar, and vegetable oil in a medium bowl.  Next, beat in eggs one at time and then stir in the vanilla.  Add the flour, salt, and baking powder and stir all together until a dough forms.  Cover dough and chill for at least 4 hours.

Preheat oven to 350 degrees. Roll dough into 1 inch balls.  Coat balls in confectioners’ sugar before putting on a cookie sheet.  Bake for 10-12 minutes.  Let cool and enjoy!

This makes a big batch of cookies so if making them just for your family then half the recipe amounts.

RHC

Korean Ground Beef and Brown Rice Bowls!

IMG_8508

Hi Housewives!

I know, I know, it’s been awhile.  I’ve been very busy trying to get some new and delicious recipes for you and also writing recipes for a magazine publication so needless to say, time has been limited.  However, today I have a very good and easy recipe for you that I just had to share.  I really know I like something when I am dreaming about it the next day and so today I am dreaming about last nights dinner and that only means one thing….it’s worth making AGAIN!

Do you get bored of the same old thing?  I do and last night I was about to make my usual meatloaf but just wasn’t in the mood for it.  I had chop meat in the fridge that I wanted to use and also a bag of Bok Choy that I needed to make as well so with that came this Korean inspired dish.  It’s quite simple to make and I had most of the ingredients already so I gave it a whirl.

  • 1 package of ground beef (You can also use ground turkey or ground meatloaf mix)
  • 3 cloves of minced garlic
  • 1/4 cup of low sodium soy sauce
  • 2 teaspoons of toasted sesame oil
  • few shakes of crushed red pepper
  • few shakes of black pepper
  • sliced green onions for garnish (I love this part of it so don’t leave this out)

In a large skillet cook your ground chop meat of choice and garlic until no longer pink.  Be sure to break it up as if you were making tacos..lol.

While that’s cooking in a small bowl mix together your soy sauce, sesame oil, red pepper flakes and black pepper too.  When your meat is no longer pink pour it over your ground beef and cook for a couple more minutes.

I use brown rice for this recipe but you can use white if you prefer.  I buy the brown rice you can cook in the microwave so be sure to put that in a few minutes before serving.

Spoon your rice into a bowl and then add the beef on top of it and garnish with your green onions.

Enjoy!

RHC

Mississippi Roast!

IMG_6497IMG_6498IMG_6040IMG_5818IMG_5819IMG_5821IMG_5820 IMG_6041 IMG_6043

Hi Housewives!

Have you ever heard of a Mississippi Roast?  Well, I hadn’t until recently that is and let me be honest here – it is EVERYTHING!!!  I am not even sure if I can go back to my usual way of making a roast.  This is just so delicious that just thinking about it makes my mouth water.  I made it for my husband and I one Sunday night and we loved it.  Then I made it for a party I threw and, no joke, people were literally asking to lick the bowl.  It literally was gone within a few minutes – not exaggerating here either.  Everyone was raving about it so much so that several friends called me for the recipe in the following days!  So, here it is and beware you may get hooked too!

  • 1 roast beef (chuck or eye round) 3-4 pounds
  • 1 packet of dry au jus mix
  • 1 packet of dry ranch dressing mix
  • 4 tablespoons of butter
  • 10-15 pepperoncini peppers
  • 1/3 cup flour
  • olive or vegetable oil
  • salt and pepper

Rub your roast with salt and pepper and then sprinkle with flour.  Heat 2 tablespoons of olive oil in a pan and when heated through brown your roast on all sides.  Once it creates a crust all around remove from pan and place it in your slow cooker.

Place butter on top of the roast. Add the pepperoncini peppers around it and on top.  Sprinkle the au jus and ranch dressing mix in and add a little of the juice from the pepperoncini jar on the bottom of slow cooker.

Cook on low for 8 hours and enjoy the deliciousness!  You can serve it on slider buns if you like.

Enjoy!

RHC

Baked Eggplant Parm!

img_6209 img_6210 img_6211

Hello Housewives!

First of all, I’d like to wish each and every one of you a Happy and Healthy New Year!  For most people, each new year brings lots of resolutions such as changes in exercise and dieting, myself being one of those people.  I happen to love eggplant parmigiana but it can be a grueling task that’s loaded with oil from frying the eggplant.  So, I decided to give baking it a whirl for a healthier option.  I have to admit, I was skeptical but gave it a try anyhow.  First of all, let me start by saying it definitely was a much easier task than all that frying!  How marvelous!!!  Secondly, it was tasty!  I really liked it and would make it this way again.

  • 2 eggplants
  • seasoned breadcrumbs
  • grated pecorino romano cheese
  • 4 eggs
  • mozzarella
  • tomato sauce (prepared ahead of time)
  • salt and pepper to taste

I like to mix the breadcrumbs and grated cheese together in a bowl.  Beat 4 eggs in another bowl.

Preheat oven to 350 degrees.

Peel the skin of your eggplant if you prefer.  I sometimes leave a little skin on some for some added fiber but that’s totally up to you.  Slice the eggplant so that it’s about 1/4 inch thick.

Spray your baking sheets lightly with Pam.

Take each eggplant slice and dip in the beaten egg.  Then dredge in the breadcrumbs/cheese mixture.

Place on baking sheets and bake for about 30 minutes until golden.

Then the layering begins!  I add some of my tomato sauce to bottom of baking dish to coat it.  Then layer the eggplant, top with mozzarella, some grated cheese and then more sauce.  Continue this layering until you have no more eggplant.  Season top layer with salt and pepper to taste.  Cover with foil and bake for 45 minutes.

Take the foil off and add some more mozzarella to the top and bake for about 10 more minutes uncovered.

Let sit and settle for a few minutes before serving. Enjoy!

RHC


Delicata Squash!

img_5325img_5327img_5328img_5330img_5333

Hi Housewives!

Have you ever heard of Delicata Squash?  Well, I hadn’t until recently.  There are a lot of different varieties of squash – butternut, spaghetti etc…but this one is one I have not had the pleasure of meeting or even knew existed.  A couple of weeks ago on my usual Trader Joe’s run I spotted this obscure, cute vegetable.  I asked a clerk about it and she informed me that you can even eat the skin and that it’s quite good roasted.   So I quickly grabbed two and purchased them along with my other yumms.

I let them sit around my house for a few days before attempting to roast them.  I finally got up the courage to make them as a side to accompany my meatloaf muffins.  Well, let me tell you – I am currently in love with this variety of Squash! Why, you say?  Well, for starters it’s one of the easiest types of Squash to cut and with minimal ingredients you have a tasty side that almost mimicks French Fries!?! Now what’s better than that when trying to cut back on carbs!?!?  So if you want a healthy side follow these few steps…

  • 1-2 Delicata Squash
  • 2 tablespoons of olive oil
  • salt and pepper

Did I mention this requires minimal ingredients?  Yup – this is it!

Cut the squash length wise and scoop out the seeds.  Then cut each side to make moon shaped pieces.  Place in a bowl and add your olive oil, salt and pepper and toss together.

Set oven to 400 degrees and place the squash on a baking sheet and roast for 15-20 minutes turning once.

Enjoy!

RHC


Seafood Puttanesca!

imageimageimageimageimageimageimageimageimage


Hi Housewives!

Today’s recipe is so darn good that I absolutely am wasting no time in sharing it with you.  I made it for dinner last night and just had to get it out there today.  It truly is delicious and if you were to order this dish in a restaurant you’d pay top dollar for it!  This is a perfect dish this time of year because tomatoes are in season and ready to be harvested if you garden or just pick up a bushel or two at your local farmers market.

I had this imported pasta from Italy, of course,  that I was saving for a special dinner and sauce.  It is Radiatori pasta and it’s so good!  I was craving a light, fresh sauce and some seafood.   So, with that in mind, I  put together some of my favorite things and made this amazing dish.  My husband literally wiped his plate clean so that is a very big inclination as to just how amazing it was.  I hope you enjoy it as much as we did.

  • 10-12 Roma Tomatoes
  • 8-10 cloves of garlic (smashed or chopped)
  • 1-2 tablespoons of extra-virgin olive oil
  • 1 can of sliced black olives (drained)
  • 1 jar of capers (drained)
  • 1 pound of fresh sea scallops (a pound doesn’t look like much but it is more than enough)
  • 1/2 bag of large frozen shrimp (raw, deveined, and thawed)
  • fresh basil leaves
  • sea salt and pepper to taste

If your shrimp is frozen you have to first thaw it out before cooking.  You can do this by letting it refrigerate overnight or place frozen shrimp in a colander with cool water and let it sit for 30 minutes.  Change the cool water every 10 minutes.

Chop up and quarter your tomatoes and set aside.  It doesn’t matter how big or small you chop them that is entirely up to you.  I go rustic and make them all different sizes.  :)

In a sauce pan heat up your olive oil and when heated through add your garlic.  When garlic is a little brown, add all your tomatoes.  Season with lots of salt and pepper.  If you want a little spiciness to this dish add some crushed red pepper flakes.  Let this cook down for about 30-4o minutes on low.  Stir often.  You can tell when it is done when the tomatoes are soft and it just gets a little bit of a saucy look to it.  When cooked down, add your capers and olives and mix through.  Add your scallops and shrimp and mix through.  I took the tials off of each shrimp when they were thawed and before throwing in the sauce.  I think it just makes a nicer presentation that way and its easier to eat.  The fish cooks quite quickly in the sauce so put it in right when you are almost ready to eat.  You will know when the fish is cooked because its color changes from translucent to white.

Don’t forget to boil your water for your pasta and cook to al dente.  When all is done add the pasta to individual serving bowls and then spoon in the fish sauce over it.  Mix and serve!  Delicious!

Enjoy!

RHC


Fresh Tomato Sauce!

image image image image imageimage

Hi Housewives!

It’s finally my favorite time of year – summer!  I am truly a summer lover and think I was just meant to live in a tropical climate all year round.  One could dream!  Anyway, I love easy summer dishes that are light and tasty so that’s where this dish comes in.  There is something about summer that makes me crave fresh ingredients.  Tomatoes flourish, as does basil during the warmer months so take advantage of the fruits and veggies that summer brings with it and indulge.

During the summer months you may be spending your time at the pool or better yet the beaches and the last thing you want to do when you get home is prepare a time consuming dinner.  That’s where this dish comes in.  Last night I had no idea what to make – I had chop meat but wasn’t  in the mood for a heavy meatloaf and it was too hot of a night to turn the oven on even with central air! Lol

I had gorgeous basil plant on hand and wanted to use some of it.  I also had my staples on hand – fresh garlic, tomatoes, pasta and extra-virgin olive oil.  So I decided to make a light fresh sauce with some pasta.  It is a very quick cooking and easy dish to make and screams summer!

  • 10 cloves of fresh garlic (smashed or chopped)
  • 1 large container of cherry tomatoes
  • 1 container of compari tomatoes
  • 1 cup of fresh basil (torn apart to smaller pieces)
  • 2 tablespoons of olive oil
  • Shredded mozzarella (optional)
  • black pepper
  • sea salt
  • 1/2 box of pasta (whatever type you prefer)

In a big pot start boiling salted water for your pasta.  When boiling add pasta and cook until al dente – usually about 10-12 minutes.

Meanwhile, in a sauce pan heat up your olive oil.  When heated add your garlic and sauté.  Next add your tomatoes.  I cut most of them in half before adding them to the pan.  Also, another option is to use all types of tomatoes and all colors to really give it some pizazz!  I did not have all varieties on hand so I went with what I had.  Anyway, let’s get back on track here – you’ve added your fresh tomatoes so now let them cook down on low and stir every so often.  Add your black pepper and sea salt to taste and let cook.   You will be able to tell when it is done because the color will change and the tomatoes will soften – it’s basically about 20 minutes cooking time.

Chop up your basil leaves or do what I do – just  tear the leaves up into smaller pieces with your clean hands! Set aside.

When your pasta is done add it to the sauce and stir so that it mixes together well.  Stir in the basil leaves and then if you want a little something special in there add about a cup of shredded mozzarella.  Serve immediately and enjoy!

RHC


Stuffed Baby Eggplant!

imageimageimageimageimageimageimageimage

Hi Housewives,

I know, I know it’s been awhile.  I am sorry for not putting up some new recipes lately but the good news is I am back and have plenty of new, delicious recipes to share with you.  Blogging can sometimes be like writing meaning that writers often get writers block and so I suppose you could say I had bloggers block! LOL  Anyway, enough of that, today I am bringing to you a recipe that is so worth the wait!  I tried this last week and it was a hit.

I love eggplant and recently my aunt was talking about how her grandmother (my great-grandmother) used to make stuffed baby eggplant.  It got me thinking and so I attempted it this week.  I did not want to make them the same way I make my stuffed peppers and so I had to switch up some ingredients in order to give them their own distinct flavor.  I use brown rice, Italian seasoning, olives and lots of other things in my stuffed peppers so for this I stood clear of those ingredients.  This recipe is a little time consuming so I’d try it when you have time to spare.

  • 6 small baby eggplants
  • 3 cloves of minced garlic
  • few shakes of dried parsley
  • a package of ground chop meat (I used beef but you can you turkey or pork)
  • 2 cups of seasoned breadcrumbs
  • 1 egg
  • 1/4 cup of extra-virgin olive oil
  • pecorino romano grated cheese (about a cup and some more for sprinkling)
  • 1/4 cup of fresh basil
  • 3/4 cup of water
  • salt and pepper
  • 2-3 cups of tomato sauce (your own marinara or jarred)  I made my own marinara.

First, cut your eggplants in half and remove the pulp.  Leave some of the pulp along the skin and be careful not to cut the skin on the sides or the bottom.  Set the eggplant skins aside.  Chop the eggplant pulp.

In a skillet, heat olive oil and add the eggplant pulp to it stirring frequently.  Add the parsley and continue to cook it through until the eggplant is tender.

In a large bowl, add the chop meat, egg, breadcrumbs, basil, garlic, grated cheese, water and the cooked eggplant.  Add the salt and pepper as well.  Mix all together with your hands.

Use this mixture to stuff the eggplant skins.  Spoon tomato sauce on bottom of a baking pan and place each stuffed eggplant in the pan.  Top the stuffed eggplants with a little more tomato sauce.  Sprinkle each with the grated cheese and bake covered loosely for 45 minutes at 375 degrees.  Take off the foil and cook for another 15-20 minutes uncovered.  This can be served hot or at room temperature.  I even enjoyed it cold the next day for lunch.

When cooked top each eggplant with a basil leaf for a very nice presentation!  Enjoy!

RHC


My Guac!

image image

Hi Housewives!

I love guacamole and with Cinco de Mayo right around the corner who wouldn’t love to make their own?  It’s fun to go out that night but then you have to deal with  the crowds, the noise, and waiting hours just to get a table.  I know I’ve been through this.  So, why not just stay home and make your own Mexican fiesta?  That’s what I’ll be doing this year.  Make tacos, burritos, margaritas and guacamole! Today I will share with you my guacamole recipe.   I absolutely love cilantro and so mine has lots in it.  I think cilantro adds something amazing to many dishes.  So, my recipe has lots and lots of fresh cilantro in it.  And remember, guacamole isn’t just for Cinco de Mayo, you can serve it at any party!  If trying to be figure friendly but still want to have a little fun serve guacamole at your next fiesta!  Avocado is a good fat so eat this before going for that onion dip.

  • 3 avocados peeled, pitted and mashed
  • 1 lime juiced
  • 1/2 teaspoon salt
  • 1/2 cup onion diced
  • 2 roma tomatoes diced
  • 2 teaspoons garlic minced
  • 5 tablespoons of fresh cilantro chopped

In a medium sized bowl, mash the avocados, salt and lime juice using a hand masher or pestle and mortar.  Mix in onion, garlic, tomatoes and cilantro.  Refrigerate for 1 hour for the best flavor or serve immediately.

Little secret: if not eating immediately place the pit of one avocado in the bowl and refrigerate, this will help the guac not its change color because after awhile guacamole tends to darken and become a sort of gross looking color…LOL! My friend Roseann’s husband told me about this and it works!

If you like it spicy add some ground cayenne pepper until preferred spiciness is achieved!  I like mine on the mild side.

Serve with your favorite chips!  Enjoy!

RHC

The Lamb….went on the Lam

image image image image

Hi Housewives!

I hope your holiday was wonderful.  Mine was nice.  Good food, good wine and most importantly family.  That is really what makes any holiday special.

That being said, since I am a food blogger and am all about “being real” and after pretty much a week of grappling with this, I realized that it is my mission to fill you in on the good, the bad, and the ugly…LOL  So, I must then tell you about my Easter Epic Fail…LOL….yes, there, I said it – Epic Fail.  I am telling you this because sometimes it is good to try new things and take chances but NEVER, did you hear me? NEVER…takes these chances on a holiday.  I made that mistake this year.  I have never made lamb in my life and since traditionally lamb was one of the dishes being served at Easter when I was a child I decided to give it a try.  Well, thank God there was plenty of other great foods to go around such as antipasto, lasagna, meatballs, fresh ham, mashed potatoes, artichoke pie, spinach and desserts that no-one left hungry.  Let me give you a little back story here…

Growing up my grandmother whom I write about in “Where it all Began”  used to make a leg of lamb for Easter.  She had a way with cooking that very few can even come close to…she was a natural and would make a wonderful meal with ease.  To this day there are things she made that I miss and wish I had the recipes for.  I am lucky enough to have her Leg of Lamb recipe but still someway messed it up.  Every Easter, she would make leg of lamb as one of her courses and you know how lamb has that gamey smell that fills up the whole house…well hers didn’t…she had a secret ingredient which I am not going to share with you until I perfect this recipe.  Yes, I will have a go at it again and then I will share with you my grandmother’s lamb recipe.

I will tell you a few thing that I may have done wrong:

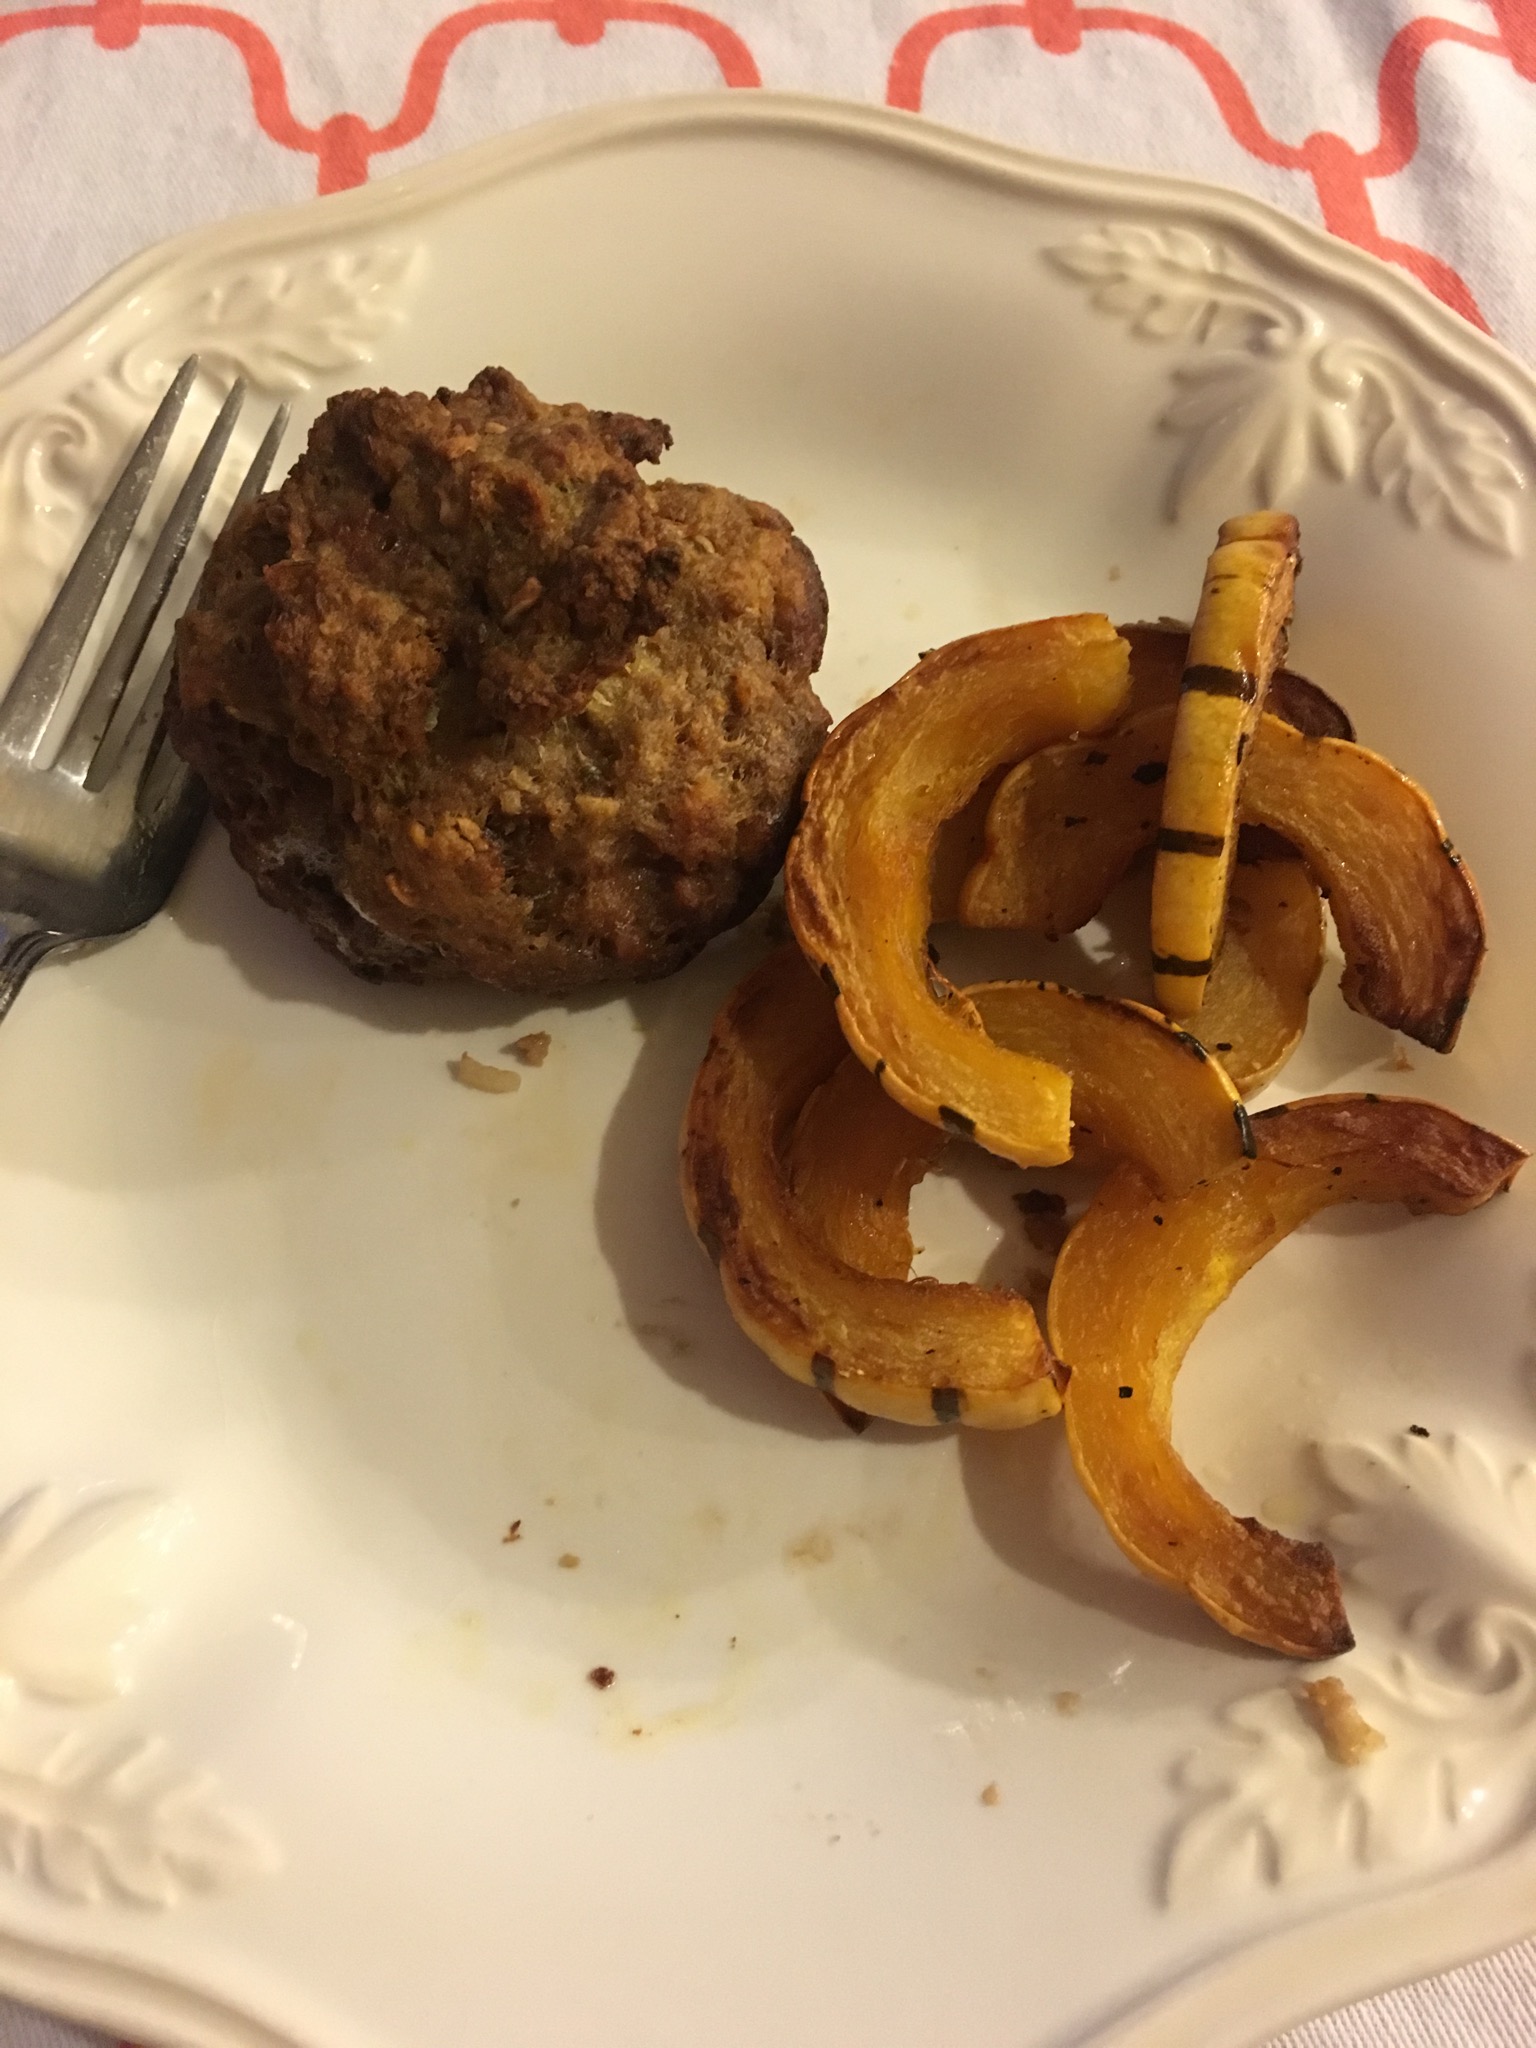
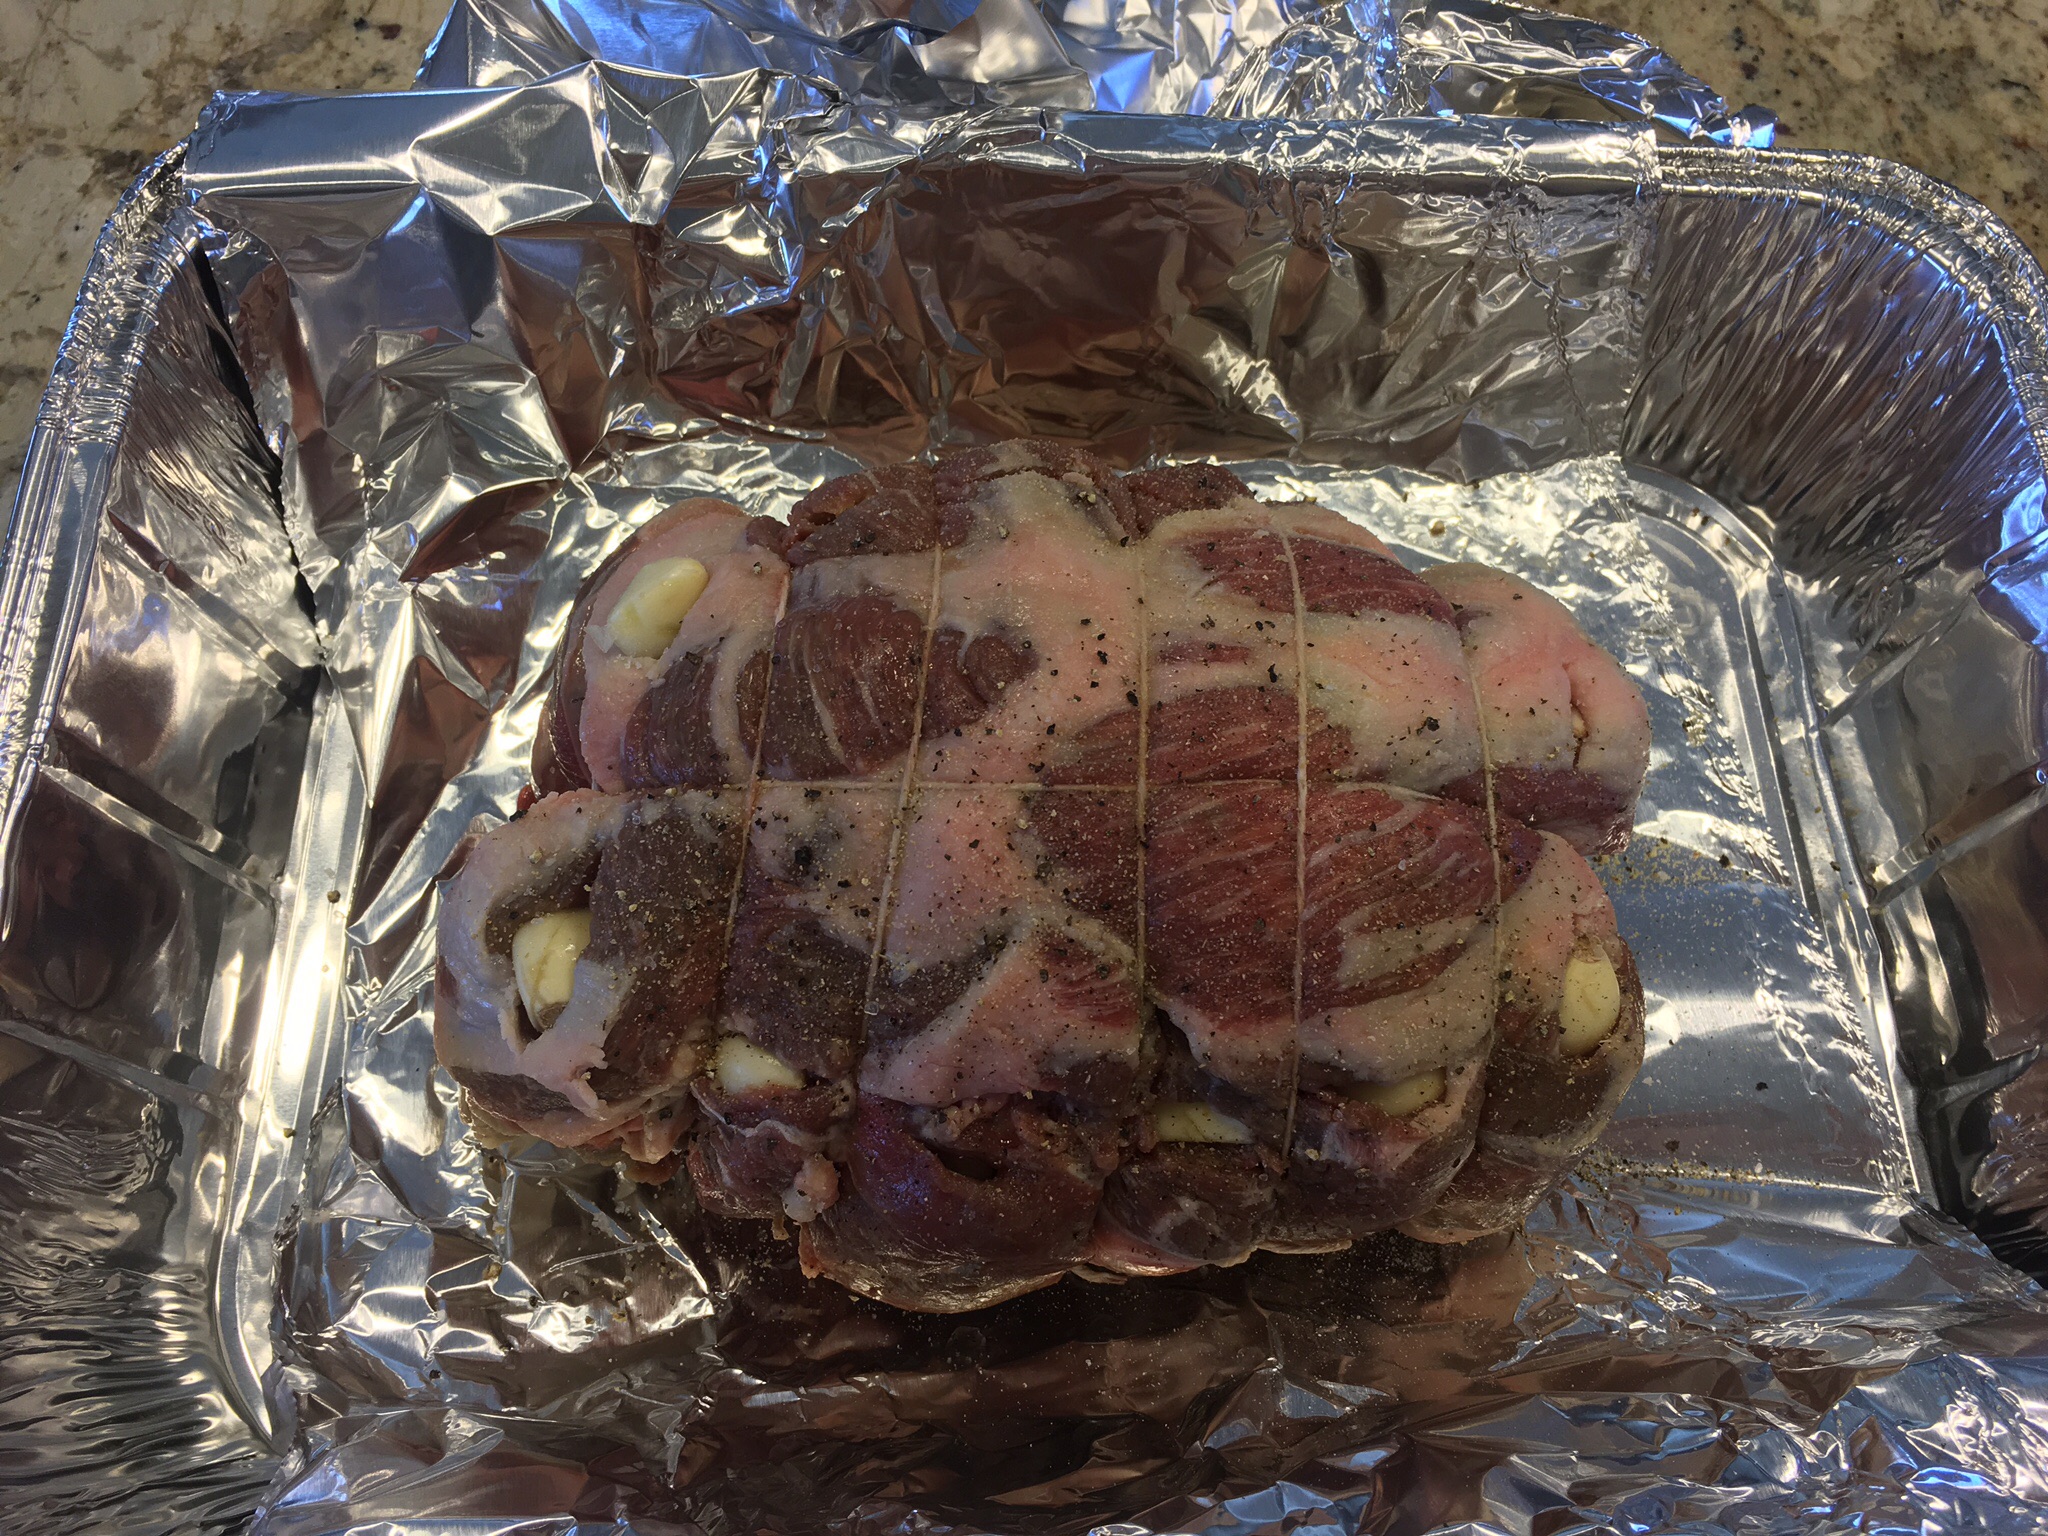
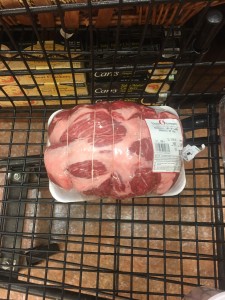
  1.  I didn’t make a leg of lamb but rather a boneless roast which didn’t seem so tender upon cutting it.
  2. I think I overcooked it…they say be careful when cooking lamb as you don’t want to overcook it but when I cut through it didn’t seem done so I put it back in the oven.  I should have let it rest because I learned afterwards that as it rests it continues to cook – lesson learned.

Anyway, I’m sharing this with you because its OK to make cooking mistakes and have mishaps that is how we learn.  Sometimes something even better can come out of it too.  The most important thing is to get up and try again!  And maybe don’t try something completely new to you on a holiday…LOL

Anyway, so I am asking all of you if you would share your lamb recipes, lamb tricks and/or your cooking mishaps with me?  Thanks!

Have a great day!

RHC

Mediterranean Haddock

image image image

Hello Housewives!

Today’s recipe is for a very simple dish.  Simple does not mean tasteless.  This dish is perfect for Lenten Fridays.  It’s healthy and really very easy to make.  Stress free and quick cooking are things that put a smile on my face!  I made this with haddock but it will go great with any white fish you prefer such as cod or tilapia.

  • Haddock (The fish monger gave me a piece for 2-3 people)
  • capers (drained)
  • a jar of sun-dried tomatoes
  • minced fresh garlic
  • oregano a few shakes
  • extra-virgin olive oil
  • salt and pepper to taste

Place your fish in a large pyres and coat with a little olive oil on both sides.  In a bowl mix together your sun-dried tomatoes, capers, minced garlic, oregano and salt and pepper.  Depending on what you buy your sun dried tomatoes may have some olive oil on them but if not add a few tablespoon of your own.  When well mixed place on top and around your haddock.  Bake on 350 degrees covered for about 25-30 minutes.  Take the foil off the last 5 minutes of baking.  It is cooked when fish flakes easily with a fork.

Enjoy with a nice white wine.  I prefer a light Sauvignon Blanc with a dish like this!

RHC

Mom’s Tuna Casserole!

image image image image image image image image image

Hi Housewives!

Today’s recipe is for a tasty tuna casserole.  If you don’t love tuna then this dish may not be for you.  I, however, absolutely love tuna!  It is and has always been one of my favorite things to eat of all time, even as a kid.  For me there is nothing better than a good old tuna salad sandwich.  My childhood friend Gina and I would always eat tuna sandwiches topped with American cheese accompanied with a side of Doritos. Today, I also eat it on top of salads or mixed in with pasta.  If having sushi, tuna is what I order.  Ok…As you can see, I’m getting overly excited about this tuna talk and have to get back to my recipe here which is for – Tuna Casserole!

I remember my mother making this on Fridays during Lent as a child and my father and I used to go wild over it.  I loved it and have been trying to perfect it for some time now.  Although, it’ll never measure up to hers in my heart and mind, I do think I have come pretty close to getting it right this time.  The key I think here is making the soup first and then mixing it with the noodles which I had not done other times and I believe it really made all the difference.  This recipe is pretty simple and doesn’t call for many ingredients but you can add whatever else you like to it…remember I am trying to make it exactly the way my mother did but I’ve seen it with peas or even celery from time to time.

  • 1 bag of egg no yolk noodles
  • 2 large cans of Campbell’s cream of mushroom soup (22.4 ounces) or 4 cans of using the small size (14 ounce)
  • 3 cans of Bumble Bee tuna – solid in water
  • Bread Crumbs for topping (seasoned)
  • Shredded Cheddar (optional)
  • Salt and Pepper to taste

Boil a pot of salted water for your noodles and cook noodles until al dente.  Meanwhile in another pot make your cream of mushroom soup according to the cooking directions on the can – I used water not milk.

Drain your tuna and chop up tuna using a fork to make it a little less chunky.  You can add your cooked soup to this big bowl or add the tuna to the soup pot and mix all together.

When noodles are cooked and drained place them in a pyrex baking dish.  Add your soup and tuna and mix all together.  Add salt and pepper to taste.  Top with seasoned bread crumbs – the more the merrier.

Bake at 350 for about 30-45 minutes depending on how crispy you like the top.  When the top is golden and crispy it’s done.  You can also broil it for a few minutes to brown it further but watch it because it can burn quickly.

Serve and enjoy!  I like to at this point top it with shredded cheddar but that’s optional!

RHC


Pasta Bolognese!

imageimageimageimageimageimageimageimage

Hi Housewives!

Today’s recipe is for a delectable Bolognese sauce which is basically a ragu’ or Italian tomato meat sauce which originated in Bologna, Italy.  Kids tend to love this dish so if you have picky eaters this may be a good way to get some protein in with your little pasta lovers.  LOL  You can serve this with any pasta you like.  I tend to like it with a gnocchi which is a potato dumpling but you can also serve it over fettuccine or any pasta of your choice.  Cook the sauce on slow and low to let all the flavors come together in a hearty sauce.

  • package of chop meat (Ground beef, pork, veal or even turkey)
  • 1 small onion chopped
  • 1 stalk of celery sliced thin
  • 1 carrot cut very fine
  • 3 cloves of minced garlic
  • 4 tablespoons of butter
  • 1 can of crushed tomatoes
  • 1 can of whole peeled tomatoes
  • oregano
  • salt and pepper
  • 1 box of pasta

Heat a tablespoon of extra-virgin olive oil in a pot.  Add your garlic, onion and veggies and cook until soft.  Then add your chop meat of choice and cook until no longer pink.  Add your crushed and whole peeled tomatoes and simmer.  Season with oregano, salt and pepper.  Cook on low for at least an hour and serve over your favorite pasta!

Enjoy!

RHC

image

Chicken Bruschetta!

imageimage

Hi Housewives!

Sometimes I  just don’t have time to prepare a lavish meal as I’m sure the same applies to you.  I just want something quick and easy but without having to sacrifice taste.  That’s exactly what I’m bringing to you tonight – a dinner that’s quick, easy and delish!  Just remember that easy doesn’t mean tasteless though. Plus, you need minimal ingredients.  I made this last week and was pleasantly pleased with the results.  I hope you will be pleased with it too. :)

  • 1 package of chicken cutlets (I prefer thin sliced but any will do)
  • 1 jar of Bruschetta (I used Trader Joes brand)
  • 1 can of sliced black olives
  • couple of handfuls of shredded mozzarella
  • salt and pepper to taste

Place chicken is a glass pyrex.  Spoon the bruschetta on top of each cutlet,  use the entire jar.  Sprinkle the drained and rinsed olives over the top as well as the mozzarella.  Then Bake for 40 minutes at 400 degrees.  Serve with a salad if you choose.  Enjoy!

RHC

Turkey Soup!

imageimageimageimage image

Hi Housewives!

Thanksgiving 2015 has come and gone and you now may be sitting with a refrigerator full of leftovers wondering what to do with them.  One of the things I like to do with my leftover turkey is make a turkey soup.  It’s perfect for the chilly weather and can also be easily frozen if you have had enough turkey for now.

  • leftover turkey carcass
  • shredded leftover turkey
  • 1 wholeonion
  • celery chopped
  • carrots chopped
  • leeks
  • turnip
  • turkey broth 1-2 cans
  • noodles
  • water
  • 1 can of cream of chicken soup
  • salt and pepper to taste

Place the leftover carcass in a big pot and fill with water enough to cover it. Put burner on low and let cook for 3 hours.  Meanwhile chop your veggies and add.  Add your shredded turkey meat as well. Salt and Pepper.

After about 2 hours take out carcass and other bones. Now taste your broth. If it’s watery add a can of turkey broth a can at a time then add your cream of chicken soup.  Stir together and let simmer.

In another pot boil the water for your noodles. Cook and serve soup over your noodles.  Enjoy!

RHC


Chicken Bake!

image image image image

Hi Housewives!

This weeks recipe is something I just concocted with some products I had on hand basically because I was bored of the same old thing.  It’s just a different take on chicken cutlets.  If you haven’t noticed already I love artichoke hearts and enjoy incorporating them into many dishes.  There are a few different steps in this recipe but when done you have a nice well-rounded meal of protein and veggies that almost anyone would love.

  • 1 package of chicken cutlets (I prefer thin sliced)
  • a bag of baby spinach
  • 1-2 cans of artichoke hearts
  • 1 pint of cherry tomatoes
  • garlic
  • Extra-virgin olive oil
  • shredded mozzarella cheese
  • Salt and Pepper to taste

First, fry your chicken cutlets.  I use seasoned bread crumbs and 2 eggs.  Rinse chicken, heat olive oil and when hot enough dip cutlet in egg and then through the bread crumbs.  Fry them up and set aside on a plate over paper towels to remove some of the excess oil.

In another skillet, heat some more olive oil and garlic. Add your spinach, aritchoke hearts and cherry tomatoes.  When sautéed place in a baking dish.  Put chicken cutlets on top of your sautéed veggies and top with some shredded mozzarella cheese if you wish.  Bake at 350 until cheese is melted.  Enjoy!

RHC