French Toast Bread Pudding!

image

imageimage

Hi Housewives!

Today I’d like to share what has become my traditional Christmas morning breakfast.  Since, I do not cook for Christmas because my father cooks the traditional Feast of the 7 fishes on Christmas Eve (which by the way is amazing) and my mother-in-law does Christmas day (which is also delicious), I wanted to start my own Christmas tradition with my husband for Christmas morning.  So, every year, I make this delicious French Toast Bread pudding.  It has become our little traditional thing to do and tradition is what the holidays are all about.

  • 1 challah loaf, sliced 3/4 inch thick
  • 8 extra-large eggs
  • 4 cups half and half
  • 1 cup of whole milk
  • 3 tablespoons honey
  • 2 tablespoons pure vanilla extract
  • a sprinkle of cinnamon
  • confectioner’s sugar and syrup for serving

Preheat your oven to 350.

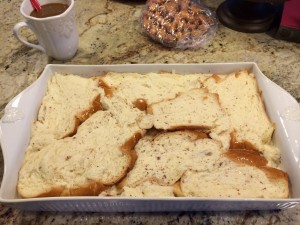
Arrange the sliced bread in a baking dish, cutting the bread to fit the dish in 2 layers.  Set aside.

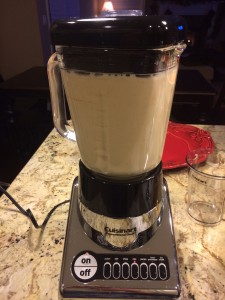
In a large bowl, add the eggs, half and half, honey, milk, vanilla extract, cinnamon and whisk together.  Pour the mixture over the bread and press the bread down.  Allow to soak for 10 minutes.

Place the baking dish in a larger roasting pan and add enough very hot tap water to the roasting pan so that it comes up about 2 inches to the side of the baking dish.  Cover roasting pan tightly with tin foil but do not let it touch the pudding.  Tent it and then make 2 slashes in the foil to allow some steam to escape.  Bake for 45 minutes.  Then, remove the foil and bake for another 40-45 minutes, until custard puffs up and the top is golden.

Remove from the oven and let slightly cool.

With a small sieve, lightly dust with the confectioners’ sugar and serve hot with your syrup of choice on the side.  I prefer pure maple syrup.  This can be prepared the night before, refrigerated, and baked in the morning although I have never done it that way before. Let me know how it comes if you do it that way.  It is also prefect for brunches.

Merry Christmas!  Happy Holidays to one and all!

Enjoy!

RHC

Coquito!


image image image image

Hi Housewives!

Today, I’m sharing my recipe for coquito with you.  Coquito is an eggnog like alcoholic beverage traditionally served in Puerto Rico. It is usually a drink that people serve during the Christmas season through the New Year.  I am not a fan of eggnog so this is the perfect Christmas drink for me!  I came across this delicious cocktail when I was in college.  I was working at a hair salon on Saturdays to make some extra cash and every Christmas a client of the salon, Isabella, would make batches of it and sell it.  The salon owner would serve it to the clients and workers on Saturdays!  When I tried it I instantly loved it.  Unfortunately, life went on and we all went our separate ways and I lost touch with those people.  I’ve never been able to find someone who made it quite as good as her.  So, after years of searching, I decided to try to make my own.  This Italian girl can conquer this, I think.  LOL

I’ve heard horror stories that it takes hours of boiling and eggs or egg whites etc.  which ultimately led to my procrastinating.  However, after some research, I found that there are many different versions of this drink with or without eggs.  I decided to try it without the raw eggs as using raw eggs in my drink didn’t really appeal to me.  I made it last night and it is chilling in the fridge.  The real test will be tonight when my friends come over for a taste test!

  • 2 15-ounce cans of cream of coconut
  • 1 14-ounce can sweetened condensed milk
  • 1 12-ounce can of evaporated milk
  • 61/2-7ounces of white rum (use more or less if you like)
  • 1/4 teaspoon ground cinnamon
  • 1/4 teaspoon ground cloves
  • a dash of nutmeg
  • 2 teaspoons vanilla extract
  • Shredded coconut

Mix all ingredients in a blender.  Refrigerate for about an hour before serving.  Serve cold.  This makes about 32 ounces.  I will update you on how it came out tomorrow!  

Enjoy!

RHC

Update:  Ok well I have to admit it was ok but definitely needs some fine tuning…I put more nutmeg in by accident and I prefer more coconut in it as well.  I will not give up on this though and plan on making another batch real soon..adding less nutmeg and more cream of coconut

UPDATE:  This year I used an actual nutmeg and lightly grated some into my coquito (very little).  You can always add more if you want but once its in you can’t take it out so go lightly.  I used 2 cans of coconut instead of one and liked this more because I prefer more of a coconut taste.  You can even coat the rim of your glass with shredded coconut or include it in your blender.  Get creative! :) Enjoy!  I am happy with this year’s results!  Merry Christmas!

Sausage and Broccolini!

image image


Hi Housewives!

Ever have one of those nights where you just don’t know what to cook?  Are you tired of the same old thing?  I am.  Yesterday, I went to my new favorite place to food shop – Trader Joe’s and came across their chicken sausage.  It was sun dried tomato and basil chicken sausage and it looked interesting.  I am a little skeptical when it comes to sausage but figured I’d give it a try.  So, with that, I went back to the veggie aisle and picked up some delectable broccolini to serve it with.

  • 1 package of Trader Joe’s Sun Dried Tomato and Basil Chicken Sausage
  • 2 packages of Broccolini
  • Garlic (8-10 smashed and chopped cloves)
  • Extra Virgin Olive Oil
  • water

Heat Frying pan and add your sausages and chopped garlic. When browned add some water to pan to cook further but to avoid burning.  Meanwhile, bring a pot of salted water to a boil.  When boiling, add the broccolini and cook for 5 minutes.  Drain broccolini with a colander and add to pan with sausages.  Pour in about a tablespoon of olive oil and let cook until sausages are cooked.

I really enjoyed their sausage!  It was tasty and just tasted wholesome.  I’ve tried chicken sausage from other places and am usually disappointed.  My husband even enjoyed it.  I would definitely buy this one again.  It’s a must try.

Enjoy!

RHC

Zucchini Spaghetti!

image image

Hi Housewives!

I love zucchini and I love pasta.  However, we all know that too much pasta may not be the best choice for your waistline.  This recipe is great and really tastes just like pasta and best of all, it’s healthy!

  • Zucchini
  • olive oil
  • salt and pepper
  • grated cheese
  • 1/2 onion chopped

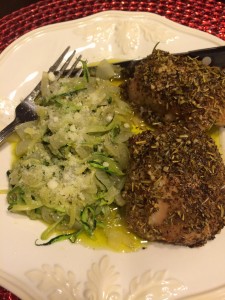
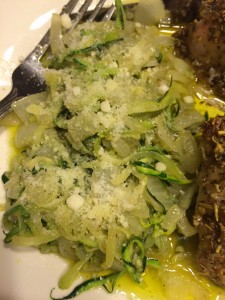
Use the Vegetti or a veggie peeler to make spaghetti like strands  of zucchini. Heat a tablespoon of olive oil in a pan and  when heated add your chopped onion.  When translucent add the zucchini and sauté.  Add salt and pepper to taste. Top with some grated cheese and enjoy!

You can enjoy this with any sauce….pesto, tomatoe etc…..

RHC


I am Thankful


Hi Housewives!

Well, we have successfully made it to Thanksgiving week and I would like to take this moment to thank all of you who visit my page and for your continued support.  I am really enjoying sharing my experiences with you and for that I am thankful.

I am also thankful for the love of my family and the traditions they have instilled in me which is what sharing my recipes is all about, passing on traditions.  To me, Thanksgiving is a wonderful holiday to be thankful for the many blessing we have.  Some complain that it is looked over and rushed because of Christmas.  However, for me, it signifies the start to the Christmas season.  I love it all and think this time of year is magical and truly the most wonderful time of year.  Enjoy it and embrace it all.

I have wonderful memories of waking up on Thanksgiving morning to the delicious aromas of my mother’s cooking.  She was fortunate to be a stay at home mom and took pride in her holiday cooking.  I would wake up to the smell of a huge turkey roasting in the oven, meatballs being fried, the gravy simmering on the stove, and coffee being brewed.  Then, the most important part of all, everyone would come over for a huge family dinner to celebrate Thanksgiving.  Aunts, Uncles, cousins, we always had the best time.  I miss those days and I think it is very important for everyone to keep passing those same traditions on to their children.  We had laughs and wonderful times.  The day was filled with eating and cousins playing and ended with the adults playing cards and us (the kids) falling asleep on the couch or floor somewhere…

If you are Italian than you know that there is a lot more to Thanksgiving than the turkey! LOL  The day started with an antipasto of cheeses, olives, dry sausages and so on.  The 1st course was manicotti and other years Swiss Chard soup with meatballs which my Grandma Alba (my father’s mother) made excellent.  I make that now and think of her when I do.  Then, the 2nd. course consisted of the turkey with  an endless amount of sides – sweet potatoes, creamed spinach, stuffed artichokes, mashed potatoes, stuffed mushrooms, cranberry sauce and of course “The Stuffing”.  The next course would be nuts and fruit followed by various cakes such as apple pie, pumpkin pie, cheesecake etc. and cookies for dessert and coffee.  Oh yes, and the chestnuts!  Somehow, every year, we always forgot they were in the oven! LOL

This week I am going to share some of my favorite Thanksgiving recipes with you.

Happy Thanksgiving to you all!

RHC

[spider_facebook id="- Select Form -"]

Slow Cooked Roast Beef!

image image image

Hi Housewives!

Roast Beef made in the slow cooker comes out very different than when it’s made in the oven.  It’s tender and juicy and full of flavor.  This recipe is super easy and has very few ingredients but the flavor is not sacrificed at all.  It is simple enough to throw in the slow cooker before work which for me is a huge plus.  There is just something wonderful about coming home from work and having dinner all ready! So try this for an easy, tasty meal.

  • 1 roast beef
  • 1 onion
  • 1 can of beef broth
  • 1 can full of white or red wine ( I fill the empty beef broth can)
  • 3 cloves of smashed garlic
  • sea salt and black pepper

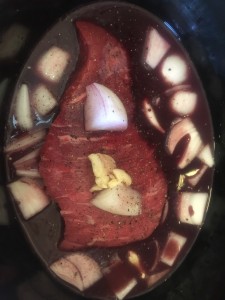
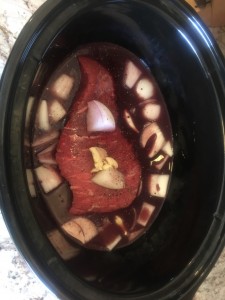
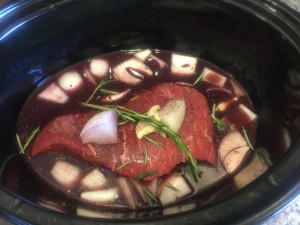
Place roast beef, the onion (quartered), garlic, beef broth and wine in the slow cooker.  Season with salt and pepper.  Cook on low for 8-10 hours.  Walk in to a home cooked meal!

You can add a few quartered red potatoes and or carrots if you wish.

  • I am making this today and added a sprig of fresh rosemary because I had it on hand.

Enjoy!

RHC

<script async src=”//pagead2.googlesyndication.com/pagead/js/adsbygoogle.js”></script>
<!– www.realhousewivescook.com –>
<ins class=”adsbygoogle”
style=”display:inline-block;width:728px;height:90px”
data-ad-client=”ca-pub-5585131265682044″
data-ad-slot=”3670166618″></ins>
<script>
(adsbygoogle = window.adsbygoogle || []).push({});
</script>

Mommy’s French Toast!

image image image

Good Morning Housewives!

This mornings recipe is a quick and easy French Toast.  I usually make this on the weekends but it is perfect for any day of the week.

My mother used to  make the best French toast and although I never had a chance to get her recipe, I think I’ve recreated it as best as my memory and tastebuds can tell.  Hers was always on the soggy side which I actually love.  However, if that is not your thing, just cook it a little more.

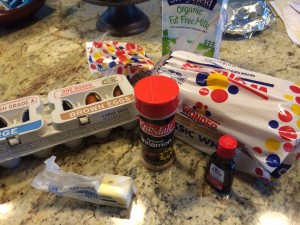
  • 1 cup of milk (whole or reduced)
  • 3 eggs
  • Vanilla Extract (about a tablespoon or more)
  • White Bread (I prefer Wonder for this)
  • Cinnamon (few shakes)
  • butter

Combine and stir milk, eggs, vanilla extract and cinnamon in a bowl.  Heat a tablespoon of butter in a skillet.  Soak bread in egg mixture and place in heated frying pan.  Cook on each side for about 2 minutes per side or until desired doneness.  Serve with pure maple syrup and enjoy!

RHC

<script async src=”//pagead2.googlesyndication.com/pagead/js/adsbygoogle.js”></script>
<!– www.realhousewivescook.com –>
<ins class=”adsbygoogle”
style=”display:inline-block;width:728px;height:90px”
data-ad-client=”ca-pub-5585131265682044″
data-ad-slot=”3670166618″></ins>
<script>
(adsbygoogle = window.adsbygoogle || []).push({});
</script>

Butternut Squash Soup!

image                 image image

Hi Housewives!

Fall is a wonderful time of year.  The weather is getting chillier and crisp and that makes it a fabulous time of year to get your soup on!  Butternut Squash is a vegetable that most people fear.  They look at it and have no idea what to do with it.  I felt the same way.  I’ve always loved canned butternut squash soup and decided it was time to try to make my own.  It can be a little intimidating but once you try it, you will see that this veggie is worth it!

  • 1 Butternut Squash
  • 1 onion chopped
  • 3 tablespoons of butter
  • 4 cups of chicken broth
  • 1 cup of water
  • 1/2 cup of heavy cream
  • salt and freshly ground black pepper

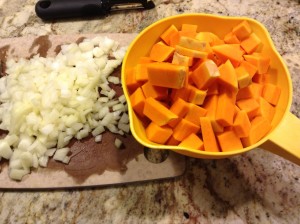
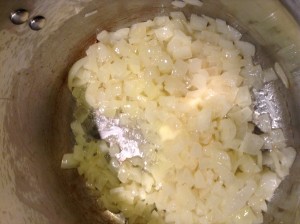
The hardest part of this is peeling the squash.  I use a peeler and try to get as much of the skin off as I possibly can.  Once that is done I cut it into chunks and discard the seeds.  Heat butter in a large soup pot.  When melted add the onion and cook until it is translucent.  Add squash, chicken broth and water.  Bring to a simmer and let cook for 20-30 minutes or until squash is tender.  Then, I add the heavy cream, stir and let cook for 10 more minutes.  Since I was not having the soup until the next day, I cooled it down and placed it in a tupperware and put it in the fridge for the night.

D-Day!  Yesterday,  I wanted to have it for lunch.  In batches, I put the soup in my nutribullet to puree everything.  This makes it just the right consistency that traditional butternut squash soup should be.  Place in soup pot and reheat on low. Stir often.  Add your salt and pepper.

You can do the puree’ all in one night and serve immediately as well.

I definitely will make this again and thought it was great.  My husband, who once told me that he doesn’t like orange vegetables, tasted it after some serious coaxing and liked it which really speaks volumes!  So, try it out and let me know how you like it.

RHC

Meatball Minestrone!

imageimage


Hi Housewives!

Soup is one of my all time favorite things to make and I’ve been told that I make excellent soups.  I have several different soup recipes and I am going to share this one with you.  A friend of mine named Gina shared this recipe with me awhile back and I’ve made variations of it ever since.

  • 1 zucchini
  • 1 onion chopped
  • 3 sticks of celery chopped
  • 1 can of diced tomatoes
  • 4 carrots chopped
  • 2 cans of vegetable broth
  • 3-4 cloves of garlic (minced)
  • ground turkey meat for meatballs
  • ditalini pasta (or any other type of small pasta)

First, make your meatballs however you normally would.  I never measure when making my meatballs, its just by eye.  You can use ground beef or a mixture of beef, pork and veal if you prefer.  I’ll share my meatball recipe at a later time, although that’s a big Italian secret…LOL

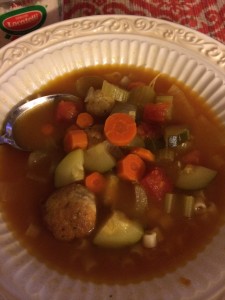
Heat some extra virgin olive oil in big soup pot.  When heated, fry your meatballs.  When browned but not necessarily cooked completely start adding your veggies.  When onions are translucent, add 2 cans of vegetable broth and diced tomatoes.  I then add 2 cans full of water.  Next, add the minced garlic cloves and some torn celery leaves (they pack a lot of flavor).  Let simmer for about 1-2 hours. Add salt and pepper to taste.

Meanwhile boil a pot of salted water for your pasta and cook accordingly.  I prefer ditalini with soups.  When ready spoon pasta into bowl and then add your soup to it.  Do not add the pasta to your soup pot as it will continue cooking the pasta and make it overdone.  It will also end up soaking up all of the soup.  Top with some grated cheese if you like and enjoy!

You can add any other veggies you like to this as well as a can of rinsed cannellini beans.  I added escarole once and it was great too! You can add quartered potatoes also but if you do then I would not have it with pasta.

This is also something that can be cooked in your slow cooker.  Put everything in it and cook on low for 8-10 hours or high for 4-6 hours.

Enjoy!

RHC


Garlic and Oil Ravi’s

image image image

Hi Housewives!

We all have nights where there is just not enough time to make a big, fancy dinner.  You work, you head to the gym or maybe you have an appointment and then, you come home and need a quick meal.  Well, this is my go to meal when time is just something I don’t have.  It is so easy and tasty and the best part is your family will think you just served them a gourmet meal!

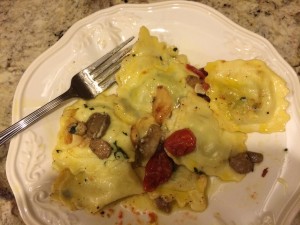
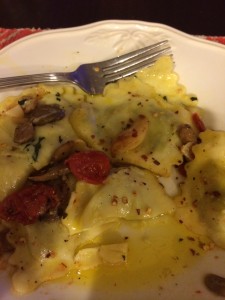
I always try to keep 2 packages of ravioli in my fridge for times like this.  I buy them when they are on sale and save them for a quick meal.  I prefer the ones that you see in the supermarket that are a little different than your average cheese ravioli.  My favs are artichoke stuffed ravi’s, or mushroom and cheese, or spinach and cheese ravi’s.  Tonight’s I used a spinach and cheese ravi from Trader Joe’s.

  • 1-2 packages of Ravi’s
  • 8-10 cloves of garlic  (smashed or minced or chopped)
  • Extra-Virgin Olive Oil
  • dash of red pepper flakes
  • cherry tomatoes (whole or cut in half)
  • mushrooms
  • salt and pepper to taste

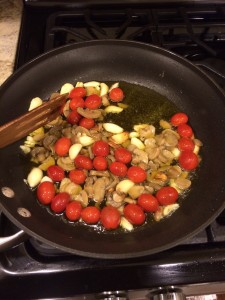
Bring a pot of salted water to a boil.  Meanwhile, in a pan, heat your olive oil, enough to coat your pan.  When heated added your smashed garlic cloves.  When slightly browned add a pint of cherry tomatoes and fresh or canned mushrooms.  Sprinkle the red pepper flakes, use as much as you like or even omit it if you prefer it not to have a little kick.  Season with salt and pepper.

When water is boiling add your ravi’s and cook according to your package directions.  When ready, drain in a colander and put in olive oil pan and mix.  Serve with a salad if you like!

Enjoy!

RHC